Varying exposure values from f4.0 to f 7.1 My camera has a auto bracketing feature which can be pre-selected meaning that one press of the shutter takes an image at the correct exposure and then one step about and one step below. The steps can be set at 1, 1/3, or 2/3rds of a stop. I have used this feature to stitch together three images to produce an HDR image using photomatrix software.
Pictures taken at iso of 200 / 400 / 800 showing different amount of grain 200 (Less) 800 (more). Generally higher values give less clarity and auto iso on my D7000 can be selected to limit at a higher value such as iso 800. However reading the web suggests that the camera can give clear pictures up to 1600 in ideal conditions. It lectures it has been suggested to me that the D7000 as a Nikon has a 'sweat spot' at iso 200 meaning that this is the clearest image although generally the lowest iso of 100 is thought to give greater clarity
These are two of the images from Picassa. Original and then B&W. Can't apply filers in Picassa but have done in Lightroom - just can't same them or blog them ...............
This exercise represents my total frustration with this OCA course. I have completed the exercise taking a colour picture (clothespegs) with a grey card (magazine image actually). Put it into Lightroom and applied 4 filters to see 4 results. Learnt a lot from this exercise but I don't know how to save each image. I have had no lightroom training other than online stuff and forums and there is knowone to ask. Forums are so impersonal and I really need a genuine human being to relate to. I have made the decision that this type of course is just not for me.
The plug and diary are yellow / purple in a ration of 1:3
Scissors to file red to green 1:1, although there is probably more of the green file than there should be.
Orange on blue filing case 1:2.
Yellow dominating with darker image shot at f5.6 and lighter image f11
Blue dominating
Orange / beige dominating
Purple
This is a series of photographs to illustrate primary and secondary colours, some shot at different speeds ./ exposures to alter colour strength. The red wreaths darken considerably on the centre image taken at f13 compared to the top image at f18.
This is a series of images of a light blue wall shot at 1/50th second from f3.5 (lightest) through to f8.0 (darkest). The colour saturation is more intense at the smallest aperture where the image is underexposed.
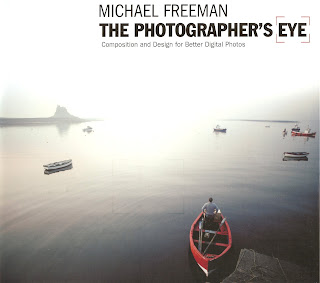
Just bought Michael Freemans book from which the TAOP course is drawn. Gives more explanation and expands on each point so very usedful to augment course.
Playing with naturally occuring shapes in the environment and used my yoga studio as an example. Tried to produce abstract images and used naturally occuring light to produce shapes rather than simply record products.
As a result of doing a flash course I bought a Nikon SB-700 speedlight for my DSLR. Am selling a lens on ebay and took the first shot using the built in camera flash, the second using the speedlight. Bounced the flash off the wall in the corner of the room to get side lighting as well and the difference between the 2 images is considerable. Used iTTL with the built in defuser to soften the light a little.
First building shows rhythm of metal varandas and marked perspective. Second is also of rhythm. Angling the camera makes the image more striking and the perpective disappearing into the bottom right rather than top left makes an unusual composition.
Third image shows pattern. The eyes of the owls give a striking appearance to the photo and I decided not to crop the bushes out to break up the stark bleached colour.
Facial features from eyes to cheeks to chin give implied triangle as does shape of buds in second image. Pen tip is triangular and point sot lower left corner of photograph. Shading helps to emphasise imbalance of left to right in photo.